
Potato, Corn & Leek Chowder

A couple weeks ago, I thought the soup making weather for the year was over – clearly I was wrong. I guess a good way to embrace the cold, is to look at it as one last opportunity to make a warm wintery soup! When I was planning the grocery/menu list this week, I asked John what soup he would want for a (fingers crossed) last soup of winter meal, secretly hoping he would pick this soup. Without any coaching from me, he said, “How about the potato one you make?”, so that sealed the deal – it went on the menu. It also happens to be a quick meal (chopping is the only kitchen time), and a one pot deal (less clean up)!
What I like about this soup is that it’s a potato soup, with more than just potatoes and cream. It has has a lot of vegetables in it, so it really feels like a balanced meal. It does use some whole milk, but just enough to give it that creamy texture, while still keeping it healthy and relatively low fat. I do realize that just before this I posted a recipe primarily made of butter and sugar – but what can I say, I like my sweets sinful and my meals, well the opposite. This soup is pretty filling, and this recipe makes a lot – so if you’re not feeding a crowd, you might want to try halving it. However, this is one of the few meals where I think the leftovers actually taste just as good or better than the original meal. This is a rare finding for me, so I don’t mind making the whole thing and eating it later in the week. I’ve never tried freezing it, but if you try it – let me know how it turns out!

Potato, Corn & Leek Chowder
Servings: about 8 bowls Prep Time: 20 minutes (for the chopping) Stove time: 25 minutes
- 2 Tablespoons Butter
- 1 1/2 cups coarsely chopped leeks (about 2 leeks)
- 1/2 cup finely chopped celery
- 1/2 cup finely chopped red pepper
- 2 cups whole milk
- 3 Tablespoons flour
- 3 cups chicken broth (or vegetable broth)
- 2 pounds yukon gold potatoes (about 8), peeled and cubed
- 2 cups corn (frozen or fresh)
- Dash of Salt & Pepper
- Scallions/Chives/Parsley for topping
Melt butter in a large dutch oven over medium heat. Add the leeks, celery and red pepper and stir until tender (3-4 minutes).

Slowly add the flour and milk to the pan, stirring constantly. Once mixed, add the rest of the ingredients (chicken broth, potatoes, corn, salt & pepper). Bring to a boil over medium-high heat. Then cover, reduce heat to low and simmer for 20-25 minutes (or as long as you want – the starch from the potatoes will continue to thicken the soup).
Serve by topping with your choice of parsley, scallions, chives, or a mix.
Slightly adapted from Cooking Light
Chocolate Chip Cookie Dough Cupcakes

Cupcakes are pretty much the trendiest food item on the market, but to be honest I’ve never made a batch of cupcakes completely from scratch – that is until yesterday. I’ve been wanting to try these cupcakes since the day I saw them on Annie’s “Best of 2010” list, but it just never seemed like the right opportunity. After all, cupcakes aren’t exactly a “snack food” you want to have around the house. Plus, these particular cupcakes have an embarrassingly large amount of butter in them; which is half the reason I chickened out on making these several times. Finally, I decided to get over my fear, and went for these cupcakes, butter and all.
Of course, they were delicious! They have brown sugar batter with chocolate chips, are then filled with an eggless cookie dough, and then topped with a frosting that actually tastes like cookie dough. So if you even have a slight fondness of cookie dough- you will love these! If you think they sound too rich, don’t worry, so did I. I thought for sure I would only be able to eat half a cupcake, but they were actually perfect, and of course eating a whole cupcake by myself was no challenge. I particularly thought this was a great “first cupcake”, because it’s something you really couldn’t try to replicate with a box mix. I made these over the course of a couple days – baking the cupcakes one day, filling them the next day, and then frosting them right before serving. I would recommend this unless you have a 4-hour block of time to spend in the kitchen all at once. I found I had too much icing left over with the original recipe, so I corrected it below to make a slightly smaller yield. Additionally, I wrote the recipe out to make 12 cupcakes, because when I made 24 it was just too many- you really only need one of these! And as a final suggestion, make sure you have some friends to share these with, because they are delicious (and dangerous!).

Chocolate Chip Cookie Dough Cupcakes
Yield: 12 cupcakes
For the Cupcakes:
- 1 ½ sticks butter, room temperature
- ¾ cup brown sugar, packed
- 2 large eggs
- 1 1/3 cups flour
- ½ t. baking soda
- ½ t. baking powder
- 1/8 t. salt
- ½ cup milk
- 1 tsp. vanilla extract
- 1/2 cup semisweet chocolate chips
Preheat oven to 350 degrees.
Cream butter and sugar with a stand mixer until fluffy. Add the eggs, one at a time. In a separate bowl, mix the flour, baking powder, and salt. Alternating with milk, add the flour mixture to the butter mixture until all the flour and milk are used up. Blend in vanilla. Stir in the chocolate chips with a spatula.
Line 1 cupcake pan with liners (12 cupcakes). Divide batter evenly between the cups. Bake at 350 for 16-20 minutes, or until a toothpick inserted in the center comes out clean. Cool on a wire rack.
For the Filling:
- 2 Tbsp. butter, room temperature
- 3 Tbsp. light brown sugar, packed
- ½ cup all purpose flour
- 1/3 cup sweetened condensed milk
- ¼ tsp. vanilla extract
- ¼ cup mini chocolate chips
Using a mixer, combine butter and brown sugar and beat until fluffy. Add flour, sweetened condensed milk and vanilla extract, and mix until combined. Stir in chocolate chips. Refrigerate mixture to allow it to firm slightly. While waiting for the mixture to chill, using a small, sharp knife, cut a cone shaped portion out of the center of each cupcake. (You won’t need the part you cut out anymore, so you can discard it, or make cakeballs out of it, or eat it with ice cream…etc.) Place a chunk of filling in the center of each cupcake, flattening the top, to make it easier to frost.
For the Frosting and Topping
- 10 Tbsp. (1 stick + 2 Tbsp. butter), softened
- 1/3 cup brown sugar, packed
- 1 ½ cups powdered sugar
- 1/3 cup all purpose flour
- ¼ tsp. salt
- 4 tsp. milk
- 1 ½ tsp. vanilla extract
- Mini Chocolate Chips
- Mini Chocolate Chip Cookies*
Combine butter and brown sugar with a mixer until light and fluffy. Add the powdered sugar a little at a time. Then add the flour, salt, milk and vanilla extract, and mix until smooth. Frost as desired. (I used a 2D Wilton pastry tip).
Sprinkle finished cupcakes with mini-chocolate chips, and push a mini-chocolate chip cookie into the center of the frosting.

*I made mini chocolate chip cookies by rolling very small dough balls from chocolate chip cookie dough, but I think Famous Amos or Cookie Crisps Cereal would also work well!
Slightly adapted from Annie’s Eats, inspired by Hello Baker
Adaptable Focaccia


There are a lot of recipes for focaccia out there, but I wanted one that had simple ingredients, simple instructions and a short rising time. I knew I wanted to make focaccia to go with the strawberry goat cheese salad we were having for dinner, but of course I didn’t start looking for a specific recipe until about 5 pm the day I wanted to eat it. This bread it perfect because it didn’t require multiple rises, can be ready in a little over an hour – and still came out wonderfully. Then again, how wrong can you really go with fresh bread? To make sure I still got an airy focaccia, I actually preheated the oven for a few minutes, then turned it off, and then put the bread inside the oven to rise. It wasn’t hot by any means, but it was definitely warmer than the ambient air, and this helped the bread rise a little faster.
I thought about halving this recipe, because I was wondering what just the two of us were going to do with so much bread, but I figured, its only flour and water so I might as well make the whole thing and then freeze what we don’t use. Well of course I should know by now that bread will never go to waste in this house! John actually cut the focaccia down the middle and made a wonderful looking sandwich for lunch. I included a variety of ideas for topping this bread, because it is very adaptable. I went with a few caramelized onions, fresh minced garlic, salt, pepper and Herbes de Provence, but I think next time I would up the caramelized onion to a full small onion, because I barely noticed the flavor. As soon as the weather gets nicer I can’t wait to use some fresh rosemary from my porch garden, mixed with some lemon zest to the mix to give it a summery feel. I don’t really think you can go wrong with whatever you put on this bread – so have fun!
Adaptable Focaccia
Prep time: 15 minutes + 5 minutes Rise time: 45 minutes + 15 minutes Bake Time: 20 minutes
- 2 1/4 teaspoons rapid rise yeast or 1 packet
- 1 cup warm water + 2 Tablespoons
- 2 Tablespoons sugar
- 3 1/2 cups flour plus more as needed
- 1 Tablespoon salt
- 1/4 cup olive oil + some to brush on top
Topping Ideas
- Fresh rosemary and lemon zest
- Caramelized onion and garlic with shredded parmesan
- Kalamata olives and feta cheese with scallions
- Herbes de Provence, salt, pepper and parmesan
- Any combination of the above
1. Warm the 1 c. water to about 110º. Add the yeast and sugar to the water, and let sit for a few minutes. (This proofs the yeast to make sure you get a airy, and quick rise)
2. In the bowl of a stand mixer, fitted with the dough hook attachment, add the water/yeast/sugar mixture. Slowly add the flour with the mixer on a low speed.
3. Mix the salt with about 2 T. water (just to start the dissolving) and then add to the mixer.
4. Add the 1/4 cup olive oil, and turn the mixer up to medium (2-4 on a Kitchen Aid).
5. Knead the dough for 7-8 minutes, until smooth. If the dough is sticking to the sides of the bowl, and not forming a nice ball, add a little bit more flour and continue to knead. *At this point I also preheated the oven to 350, only for a few minutes.
6. Remove the dough from the mixer, and place in a well oiled bowl. Turn the dough over to slightly coat in oil, and cover with plastic wrap. (The oil prevents the dough from forming a “crusty skin”, which is more common if you are having the dough rise in an extra warm place).
7. With the oven now turned OFF, place the bowl of dough in the oven or in another warm place, and let rise for 45 minutes.
8. Once doubled in size, remove the dough from the oven, and using your hands, flatten the dough about a 10×12 inch rectangle. It should be around 1/2 inch thick.
9. Place the dough rectangle on a greased cookie sheet, cover with plastic wrap or a towel and let rest/rise for at least 15 minutes (longer is fine).
10. In the meantime, preheat the oven to 400 degrees, and you can get your toppings together. If you are caramelizing onions, this would be the time to do it. Or chop up your rosemary, shred your parmesan, or zest your lemon.
12. Brush the top of the bread with olive oil, sprinkle with a little bit of salt. Using your finger, press down on the top of the bread 10-20 times to create dimples. Top with toppings of choice.
13. Bake in the 400° oven for 18-20 minutes or until golden brown.
Recipe adapted from Tyler Florence, with some insight from Pink Parsley.

Strawberry Goat Cheese Salad

This past weekend, we had a little post-St. Patrick’s day celebration with some friends, and everyone was kind enough to bring something to go along with the corned beef sandwiches I made. To be honest, I didn’t like the corned beef or the coleslaw topping enough to share the recipe, but I did get another delicious idea from this mini-potluck. Our friends Lexi and Brad made a delicious salad with strawberries, goat cheese, almonds, and homemade poppyseed dressing. It was so good that I have been thinking about it since Friday!
I vowed to eat more fruits and vegetables this week, and what better way than with strawberry salad. The part I liked the best was definitely the goat cheese. I’m a big goat cheese fan, but surprisingly enough I don’t know that I’ve ever put it on a salad. Since it’s a very soft cheese, you can’t really chop it or shred it, but crumbling small pieces worked pretty well. I chose to go with a raspberry vinaigrette for the salad because I wanted something super light, but the poppyseed was also delicious. For the raspberry vinaigrette, I added Herbes de Provence, which is usually a mix of rosemary, thyme, sage, anise and lavender – but it varies a lot from mix to mix. In all honesty, at some point in the past, I was out of rosemary and in the middle of making dinner, so figured I’ve got this stuff ,and it has rosemary in it – I’ll try it. Since then I haven’t actually replaced my rosemary, I always just substitute Herbes de Provence – it just sounds so delightful, don’t you think?
Raspberry Vinagarette
- 3 T. Extra Virgin Olive Oil
- 2 T. water
- 3 T. Raspberry Balsamic Vinegar (I even found this at Walmart)
- 1 garlic clove, minced
- 1/2 teaspoon Herbes de Provence or Rosemary (or 1 teaspoon fresh rosemary)
- 1 tablespoon honey
- Dash of salt and pepper
Wisk all ingredients until combined.
Strawberry Goat Cheese Salad
- 4 cups spring mix salad
- 1 cup of strawberries, sliced
- 3 oz goat cheese, crumbled
- 1/4 cup Pecans or Almonds (or both)
Place the almonds or pecans on a small baking tray and sprinkle with salt. Toast them under the broiler for a couple of minutes. Be sure to watch them the whole time! They go from toasted to burnt in about 2 seconds (speaking from personal experience). Combine all the ingredients in a large bowl, and toss with raspberry vinaigrette.
*I don’t actually measure out how much of anything I put into a salad, so this is just a rough suggestion.
Cinnamon Raisin Swirl Bread

I really love baking. It probably has something to do with the fact that I really love sweets, and sweets are generally baked. It also has something to do with the fact that baking requires measuring and exactness – which oddly enough makes it a nice relaxing break from our everyday chaotic lives. I like the idea that I can relax while at the same time doing something productive- and I have something to show for it when I’m done! The only problem with this is that one can only desserts so much. If you would like to bake something, but fear (like me) that brownies will disappear in an embarrassingly short time, this bread would be the perfect choice. This bread is perfect for slicing for breakfast and running out the door with. I like it just plain, but John (of course) likes to add butter to it.
Like any yeast bread, it requires a lot of waiting around for the dough to rise – but each step actually takes very little time. It’s really perfect to make on a day you were going to spend at home anyways. It can make a nice break from something monotonous (like studying) because after each step, you have to wait around for 40 minutes to an hour anyways. I included step by step pictures, but only because they are fun, not to make this seem like it’s a really difficult recipe! Each step is very simple. The trickiest part is making sure to completely seal the loaf before baking – so that no cinnamon sugar mixture leaks out and burns on the sides of the pan. This recipe makes 2 loaves, so you have one to give to a friend or freeze – but if you only want one, it can easily be halved. When freezing this bread, I wrap it in aluminum foil, and then place it in a freezer bag, and it freezes wonderfully.
Cinnamon Raisin Swirl Bread
Makes 2 standard (9×5) loaves
For the dough:
- 2 1/4 tsp. instant yeast (or 1 packet)
- 2 cups warm milk (~105-110˚ F)
- 34 oz (6 1/2 cups) all-purpose flour plus more for dusting
- 8 Tbsp. unsalted butter, softened
- 1/2 cup sugar
- 2 large eggs
- 3 tsp. coarse salt
- 3 tsp. ground cinnamon
- 1 cup raisins
- Cooking spray
For the filling:
- 1 1/2 cups sugar
- 2 Tbsp. ground cinnamon
- 1/4 cup water
- 1 egg, lightly beaten
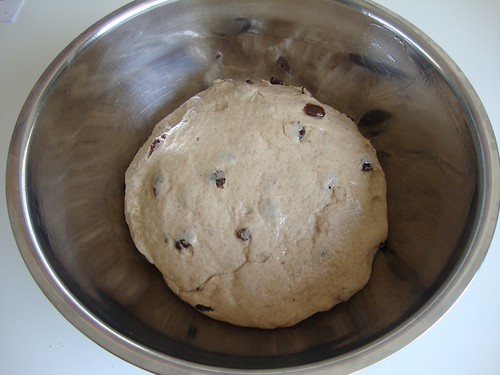
Start by combining milk and yeast in the bottom of a stand mixer fitted with the dough hook attachment. Add the flour, softened butter, sugar, eggs, salt, & cinnamon. Turn the mixer on low speed (2), and knead the dough for 3-4 minutes. Add the raisins and continue to knead for 3-4 more minutes. The dough should be smooth and clear the sides of the bowl. If it is too sticky to handle, add a little bit more flour and knead for a few more minutes.
Remove the dough from the mixing bowl, and place in a large bowl coated with cooking spray. Turn the dough over to lightly coat the outsides with oil. Cover with plastic wrap or a kitchen towel. Place in a warm, draft free place and let the dough rise for about 1 hour, or until doubled. I like to put mine inside a turned-off oven.
Take the dough out and divide into 2 equal pieces. I weighed mine using a food scale, but if you don’t have one you can just eye ball it.

Working with one piece of dough, flatten it into a circle using your palms.

Then fold the dough into thirds, like a letter.

Then fold again into thirds, the opposite direction. The purpose of this is 2 fold. First of all, it basically serves as a very gentle kneading, which releases any gas built up in the dough, and gives the yeast access to new nutrients. But do not “knead” the dough, or over-handle it -because this will destroy the gluten strands that give the bread it’s airy and light weight texture. Secondly, this method helps to shape the dough into a rectangle, which is helpful in the next step.

Once each loaf is folded, place them seam side down in an bowl coated with cooking spray. (Each loaf should get it’s own bowl at this point.) Cover with plastic wrap or a towel, and allow the dough to rise for an additional 45 minutes.

Once the dough has risen for the second time, roll out one ball of dough into a 15×11 inch rectangle.

In a small bowl combine the sugar, water and cinnamon. Brush the rectangle of dough with the slightly beaten egg, and then spread about half of the cinnamon sugar mixture over the rectangle, leaving a small border at the edges. (If you want to be very exact, you can mix 3/4 c. sugar, 1 T. cinnamon, and 2 T. water for the first loaf, and then do this again for the second loaf.) *Note: if you add too much water to the cinnamon sugar mixture (which I have done before), it will seep out of the loaf, and create a burned sugar crust to your bread. So while mixing together the sugar-err on the side off too little water. The amount in this picture is a little too liquidly.

Fold in about one inch of the edges of the dough, in order to seal the cinnamon-sugar mixture in.

Starting with the unfolded edge of the dough, roll dough into tight log. Press gently as you roll to ensure the dough is sticking to itself – this will help prevent the cinnamon sugar mixture from seeping out.

Once the dough is rolled, pinch the edges of dough together tightly. Use some water to make sure the dough adheres.

Place dough seam side down in a heavily greased 9×5 inch baking loaf, and repeat with remaining roll.
Cover each loaf pan with a towel or plastic wrap, and let rise again for 40 minutes so that the dough just rises above the edge of the pan.
Preheat oven to 425 degrees. Brush the remaining egg over the top of each loaf in order to give it a shiny, finished appearance (I didn’t do this for this loaf, hence the less than perfect surface). Loosely tent a piece of aluminum foil over the top of each pan, to prevent the top from over browning.
Place loaves in the oven and bake for 45 minutes. 20 minutes into baking, remove the foil “tent” to allow the surface to brown. Remove from the oven, allow to cool slightly and then remove from pan and cool on a cooling rack.

Recipe found at Annie’s Eats, and originally from Martha Stewart’s Baking Handbook
Twice Baked Potatoes

In honor of St. Patrick’s Day, I figured what would be better than a POTATO with the colors of the Irish flag! I made mine with broccoli, scallions, and cheddar, so I could get the green, white and orange effect. I hope this brings a little St. Patrick’s Day spirit to your day!
My better half is interviewing people this week, so it’s just me here until tomorrow. Cooking for 1 can be tricky, but I think this recipe fits the bill – It’s quick, easy, and I had all the ingredients on hand. The recipe is for 4 potatoes, but can easily be adapted to make just 1, or 8. I often forget how great a good baked potato can be. In college, my friend Christine, once had a “Baked Potato Party” in which she baked a bunch of potatoes, and then had all kinds of fun toppings for us to put on them. It was such an easy and creative idea, and I have been wanting to do it ever since – maybe this will inspire you to host your own. Whatever you put on your baked potato, it can be a hearty, and filling meal that’s easy and cheap to make. I also included some suggestions for alternate stuffed baked potatoes , which I am now dying to try!
Twice Baked Potatoes
- 4 russet potatoes – scrubbed and patted dry
- Olive Oil and Salt
- 1 cup sharp cheddar cheese, shredded
- 3/4 cup light sour cream
- 1/4 cup skim milk
- 1 teaspoon garlic powder
- 3/4 cup chopped broccoli, steamed
- 1/2 cup chopped scallions
Preheat oven to 400°. Rub potatoes with a small amount of oil and sprinkle with salt. Place potatoes directly on rack and cook for 45-60 minutes. Do not wrap potatoes in foil because this will make the skins soft and it will be difficult to scoop the filling out later.
In a large bowl combine 1/2 cup of cheddar cheese, sour cream, milk, garlic powder, broccoli, and 1/4 cup scallions.
Remove potatoes from oven and let cool slightly. Cut the potatoes in half lengthwise. Using a soup spoon, scrape out as much potato as you can while leaving the skin intact – leaving about 1/8 inch. The potatoes taste better when there is less plain flesh left in them. Add the flesh to the large bowl with sour cream mixture. Mash the flesh until combined.
Spoon the flesh back into the potato shells. Place filled shells on a baking sheet coated with aluminum foil. Sprinkle remaining cheddar cheese over the tops of the potatoes.
Return potatoes to the oven for 10-15 minutes or until cheese is melted and starting to brown.
To serve, top with remaining scallions.
Variation 1: Blue Cheese, Onion and Mushroom Potatoes
- Substitute 1 cup crumbled blue cheese for the cheddar, and 1 cup sautéed mushrooms and onions for the broccoli.
Variation 2: Goat Cheese & Caramelized Onion Stuffed Potatoes
- Substitute 1 cup of herbed goat cheese for the cheddar, and 3/4 cup caramelized onions for the broccoli.
Variations inspired by America’s Test Kitchen Healthy Family Cookbook
Royal Icing – Recipe and Tutorial


So maybe St. Patrick’s day isn’t considered a major holiday for most people, but those people didn’t grow up in my family. In my (half) Irish family, St. Patty’s day is probably the next big holiday after Thanksgiving and Christmas. I had been wanting to decorate St. Patty’s day cookies pretty much since I finished the Valentine’s Day ones. It worked out perfectly, because my festive mother was here to help me decorate them! I mentioned earlier that I really wanted to try to get good enough at royal icing to post a “How to” – and I think I have just about reached that point. I’ve made it enough times now that I have it down to a science. It’s kind of addicting, so be careful. My mom and I are already planning next year’s St. Patty’s Day cookie decorating, and we were even brainstorming about Easter….
A lot of people wonder – “Why use royal icing?….Doesn’t buttercream taste better?”. And I’ll say, yes if you are eating icing by itself, buttercream is definitely the way to go – but with a buttery cookie underneath royal icing adds a perfect amount of sweetness without being too rich. Plus the royal icing seals in the moisture of the cookie, so your cookies can be made ahead of time, and will last a lot longer. More importantly, it’s just not possible to decorate with buttercream the way you can with royal icing. Ever wonder how professional cookies get that completely smooth surface with multiple colors and no “spread marks”? That’s right – they use royal icing.
So here’s the recipe, followed by a long tutorial. I tried to include as many pointers as possible, but for the most part you can figure out what to do looking at the pictures.
Royal Icing
- 4 cups Powdered Sugar (About 1 Pound)
- 2 Tablespoons Meringue Powder
- 5 Tablespoons Water (to start)
Combine all ingredients in the bowl of a stand mixer. Mix on low (Speed 2 or 4) for 7-10 minutes, or until the sheen has disappeared and the icing has a matte appearance. It will be too thick to use at this point so you will be adding more water later; however, getting it to this texture makes a difference in the final product.
How to Decorate with Royal Icing
- 1 -2 batches of Royal Icing and Sugar Cookies
- Small plastic containers with lids
- Pastry Bags (I like disposable so you don’t have to clean them)
- Couplers and Decorating Tips (I use size 3)
- Toothpicks
- Gel Food Coloring
- Miniature Squeeze bottle (optional)
First, start by planning out what colors you will want to use, and how much of each. For these cookies, I made 5 colors: Green, Light Green, Orange, Black, and White. According to color need, divide the white icing into the containers. Add about 1 additional teaspoon of water to each container. Stir to incorporate. You may need to add another teaspoon or 2 in order to get a good consistency for piping. The key is to get the icing thin enough that you can easily pipe a smooth line, but thick enough that the icing will still dry quickly.

Using toothpicks, add a little bit of gel food color and stir with a spoon. Continue adding color until you achieve the desired tint. For dark colors, like black or red, you will need a lot of gel.

Prepare your pastry bags by cutting about 3/4 of an inch from the tip. Place the coupler inside the bag, and secure the appropriate tip. I prefer size 3 for edging the cookies, but I used a mix of sizes 2-4, because that’s what I have. If you do not have pastry bags and tips , you can try using a ziploc bag and cutting the corner to make a VERY small hole. I only spent about $10 for all the couplers, tips and bags, but if you are only going to make these once, it might not be worth it.

Fold down the edges of the pastry bags, and using a spoon or knife, scoop the icing into the pastry bag. You only need a very small amount of icing to edge the cookies, but I think it’s easier to work with if you have a moderate amount of icing in the bag. Also, it’s easy to simply squeeze the left over icing back into the original container when you are finished.

Pipe the icing around the edges of each cookie to make an outline. To get the smoothest line possible you do not want the tip to be touching the cookie.


I think it’s better to work quickly and let the icing lie smoothy, than to try to get an absolutely perfect shape for the outline. If you look at these, some of the cookies have a smoother outline, and some are more squiggly.

Once the cookies are lined, squeeze unneeded icing back into the container. Now it’s time to thin the icing for flooding. Add 1 teaspoon water at a time to each icing, stirring after each addition. You want the icing to be thin enough that when a spoonful of it is poured back into the container, it takes about 4 seconds for it to disappear into the pool of icing. It is better to err on the side of too thick of icing than to thin. If you accidentally make the icing too thin, add a little bit of powdered sugar to get it back to a normal consistency.

You should now let the icing set for about 5 minutes in order to get the air bubbles to rise to the surface. The first time making this, I didn’t do this, and you end up with air bubbles on what was supposed to be your smooth surface cookie. Once the air bubbles have risen to the surface, gently stir the icing through once, just to pop them.

If you are using mini squeeze bottles, this would be the time to transfer the icing into the bottle. It’s easier to do if the icing is in a flexible plastic container, because you can bend the container to funnel the icing in. This was my first time using squeeze bottles, and it does make it a lot easier to flood the cookies, but it also makes one more thing to clean when finished.


Now flood the cookies. If you are using squeeze bottles, just squeeze it around the edges and move inward to fill the cookie in.


If you are not using squeeze bottles, spoon the icing onto the top of the cookie, and then spread it to the edges using a toothpick. 2 pointers: 1) If you spread the icing over just over the edge of the piping, it will help to blend the piping with the flooded icing. 2) It looks a lot better if you over-flood the cookies, so that the icing ends up creating a dome look on top of the cookie. If you under-fill them, the center will sink down and the outer edge piping will be very visible.


If you want to decorate the cookies with sprinkles, as I did with the pots of gold, it’s best to put this on while the icing is still wet. If you want to pipe a design on top of the cookies, it’s best to let the cookies dry for at least 45 minutes (or overnight). For the “plaid” effect on the cookies, I cleaned up while letting the cookies dry, and I just used the little bit of icing I had left in my pastry bags and piped perpendicular lines over several cookies in a row.

Let let the cookies dry for several hours or overnight before packing them up. The cookies should then be stored in an airtight container or cellophane bags. These cookies will last for at least a full week, and once the icing has dried, it is very sturdy. Therefore these cookies can be made in advance and are great for mailing.

Inspired by Annie’s Eats
Panko Crusted Salmon

Back on the homefront, I’m trying to make the best out of my last 3 days of my last spring break…ever! Because THE BOARDS are looming over our heads, I’m not really sure if I’ll be able to make it home for a visit before July – so my Mom decided to make the trek here to visit! Unfortunately, the weather was really awful in Cleveland (so much for spring), but my Mom’s a brave lady, and she tackled the snow to make the drive to Toledo. I’m really glad she did because we had a lovely day “fliting” around, and of course I wanted to make a special dinner for the evening.
This dinner exceeded my expectations. I knew I wanted to make salmon – but salmon is such a hearty fish that I have trouble deciding what to do to make it special without overpowering its great flavor. While visiting my favorite “club” – Costco – I was flipping through Ina Garten’s new book, and saw a recipe using Panko with Salmon. Because I have also really been wanting to use Panko, I thought this would be the perfect opportunity to try it. I didn’t buy the book, so this is my own adaptation.
It turned out to be really easy but it tasted, and looked gourmet (win-win!) I loved the lemon zest in the crumb coating, and you definitely shouldn’t skimp on it. I also think that salmon is one of the fish that you need to be careful to buy “Wild Caught”. It’s a little more expensive than the farm raised, but it’s a lot healthier and has a better flavor. For some fish – it doesn’t really matter, but salmon is not one of those fish. Panko crumbs can be found in any local grocery store, usually near the Asian food.
Panko Crusted Salmon
Serves 4-5
- 1 lb Wild Caught Salmon filets
- 3/4 cup Panko
- 1/4 cup finely chopped parlsey
- zest of 1 large lemon (or 2 small)
- 2 Tablespoons Olive Oil
- 1 Tablespoon Dijon Mustard
- 1 Tablespoon Mayonaise
- Salt & Pepper
Preheat oven to 375 degrees.
In a small bowl combine the Panko, parsley, lemon zest and olive oil. Stir until well blended and Panko is evenly coated with olive oil. In an even smaller bowl, mix together 1 T. each of Dijon mustard and mayonaise.
Place salmon filets on a baking sheet coated with aluminum foil. Sprinkle evenly with salt and pepper. Spread the Mayonaise and Dijon mixture evenly over the filet. Sprinkle the Panko crumb mixture evenly over the fish. The mustard mixture should help the coating to stick, but press to adhere.
Bake the salmon for 10-15 minutes (Using a 1 inch filet 15 minutes was good for me).
Serve with lemon wedges. Also good with rice pilaf and roasted asparagus.
Inspired by How Easy Is That? by Ina Garten.
Pirouettes AKA Cigarettes Russes

So I finished my test (yeah!) and as it turns out, blogging actually helped my grade – so I think its safe to continue! Almost immediately after the test, we left for Taos, New Mexico. We had a great visit with my in-laws, ate and drank well, and even got some skiing and hiking in. Apparently we brought the bad weather with us, but it was still better than the cloudy skys we came back to in Ohio. I was planning on taking a break from cooking while on vacation – but of course I got the urge to bake after about 10 hours. Actually I’ve had the urge to bake these particular cookies for several weeks. I kept putting them off because they looked kind of complicated, but spring break seemed like the perfect time to try these out!
The reason I have been wanting to make these cookies for so long, is that you really can’t buy them anywhere! Sure, you can buy filled Pirouettes, but I like the plain and simple taste of just the wafer – without hazelnut, mint, or chocolate cream inside to ruin it. Pepperidge Farm does actually make the simple “Cigarettes Russes” (without the filling), but the only place I have ever seen them is inside of the entertaining pack of assorted cookies, and even then you only get like 2! So while I really did enjoy making these cookies, there was also a utilitarian reason for making them.
I actually tried making these twice. The first time they did not work out …at all. I’m going to blame it on the 7,500 altitude in Taos, NM, but honestly I think there were a bunch of factors that caused the initial demise of these cookies. The second time was much better, and now I know the specifics of how to make them perfect – and lucky for you, I’ll share that info with you :-)!
Cigarettes Russes
- 6 Tbs. (3/4 stick) softened butter
- 1 cup powdered sugar
- 4 egg whites at room temperature (the first time I took them straight from the fridge – which didn’t work)
- 2 tsp. vanilla extract
- 2/3 cup all-purpose flour
- 1/8 tsp. salt.
1. Preheat an oven to 425°F. Line 2 large baking sheets with silicone liners. (Do NOT use Parchment. If you don’t have silicon liners you could try a greased cookie sheet, but this didn’t work as well for me)
5. Add the vanilla and beat until blended.
6. Mix flour and salt together, and gradually add to buter mixture. Stir to combine.


Chocolate Dip
- 3 oz semisweet chocolate
- 1 tsp butter
- 1 tsp corn syrup (if you have it – I didn’t so I didn’t use it)
Adapted from Williams Sonoma
Stuffed Green Pepper Soup

If you start taking pictures of the food that you cook at home, it doesn’t take long to realize that a lot of homemade meals are just not that photogenic. Unfortunately, we don’t eat cookies, cupcakes and sushi all the time . But I don’t want to fall into the rut of only posting things that turn out pretty – because, well that would mean I’d be making (and eating) an awful lot of baked goods. Plus, I wanted this blog to be a mix of everything that is good to eat. Hopefully, if my photography skills improve, I’ll be able to make even “un-photogenic” foods look as delicious as they are. But for now, you’ll just have to trust me.
This soup doesn’t look like much, but I really love it. This week is “test week”, so I can pretty much assure you that If I get around to posting anything, it will be easy to make. I like to use cooking as a break from sitting, all alone, in the room that John and I like to call “The Dungeon”. But during a really busy week, being away from my books for more than an hour starts to stress me out. So sometimes, I just bring my books with me, to the kitchen, or the gym, or the couch… But seriously, this dinner takes about 15 minutes of prep and packs a lot of flavor. It’s a lot less work than actually stuffing green peppers, but it’s very hearty and will warm you up on a cold winter night. Really it’s not a “soup” in the sense that you could probably eat it with a fork if you’d like, but there was really not another word to use to describe it.
Stuffed Green Pepper Soup
Makes about 4 servings
- 1/2 lb. lean ground beef
- 2 green peppers, seeded and chopped (about 2 cups)
- 1 cup chopped onion (about 1/2 a large onion)
- A dash of crushed red pepper & a Pinch of black pepper
- 1 can (14.5 oz) diced tomatoes, undrained
- 1 can (10.75 oz)condensed tomato soup, undiluted
- 1 can (14.5 oz) of low sodium beef broth
- Hot white rice (I usually make 3-4cups of rice – it’s cheap and I’d rather have more than enough)
In a dutch oven, over medium heat, cook the ground beef for 3-5 minutes, or until brown and crumbly. Add the green pepper and chopped onion and cook for about 8 minutes or until slightly softened. Add a dash of crushed red pepper (or more if you like spice) and a pinch of black pepper. Pour in the can of tomatoes, tomato soup and beef broth. Bring to a boil. Reduce heat and simmer, covered, for 45 minutes. Serve over hot white rice.
Barely adapted from Cooking Light

