
Malted Chocolate and Marshmallow Six Layer Cake

In case you didn’t know, my birthday was on Monday, and our anniversary was the day before that. Needless to say it’s been a food-filled week! With my brother having the same birthday as me, it’s always felt like Christmas in July, but now with an anniversary to add to the festivities, July is quickly becoming my favorite month of the year. Unfortunately, (or fortunately for him), brother John is spending the summer fishing working in Alaska, so I might just have an excuse to make another celebratory birthday cake when he returns in August. I know some people would view it as work to make their own birthday cake, but I view it as an excuse to buy fancy ingredients and make something over-the-top without any regrets. It’s basically like my present to myself. I had a lot of fun sifting through recipes, but with so many combinations of cake and icing to chose from, it was really hard for me to decide on one. I ended up picking this cake because Sweetapolita named it “Campfire Delight” and since I love summer and the campfires that come with it, I couldn’t resist. After making this, I don’t think campfire delight is really a fitting name (after all it’s missing the essential graham cracker part of the s’more), however this cake is totally over the top delicious.
I was set on the fact that I wanted to make a 6-layer cake, only because I had never made one before and I wanted to try something new. Unfortunately I didn’t want to be taking pictures while visiting with friends, so I have no pictures to show you of the inside of this mile-high cake. You’ll just have to trust me: 6 layers really makes a nice presentation and is definitely worth the extra effort. How can you go wrong with an almost equal filling to cake ratio? Keeping that in mind, you can’t eat very much of this cake (at least at one time). But that makes it a perfect birthday cake to share with some friends!

Rich Chocolate Cake
– Recipe as indicated is for 3-9′ inch rounds
- 2 2/3 cups all-purpose flour
- 1 1/2 cups granulated sugar
- 1 cup + 2 T. good quality cocoa powder*
- 3 teaspoons baking soda
- 1 1/2 teaspoons baking powder
- 1 1/2 teaspoons salt
- 3 eggs
- 1 1/2 cups strong black coffee (hot or cold is fine)
- 1 1/2 cup buttermilk, room temperature
- 3/4 cup vegetable oil
- 1 1/2 T. pure vanilla extract
*I used Williams-Sonoma’s Dutch cocoa powder, but I think this is a better deal. A good quality cocoa powder really makes this cake.
1) Prepare 3 x 9″ pans by cutting out a circle of parchment to line the bottom, and butter and flour to coat the edges. Preheat oven to 350°.
2) Sift all dry ingredients together in the bowl of a stand mixer. With the paddle attachement, add the remaining ingredients to the dry ingredients and mix for 2 minutes on medium-low. (You may need a splatter guard on your mixer as batter will be liquidy).
3) Pour into prepared pans. To ensure even layers, I weighed the pans until I get the same amount in each.
4) Bake for 20 minutes, then rotate placement of pans in oven. Bake for an additional 15 minutes (35 minutes total) or until a toothpick comes out clean when placed in the center. Cool on wire racks for 20 minutes, then remove from pans and let cool completely. Wrap in plastic wrap and place in the refrigerator until you are ready to assemble.
5) To cut the cake layers to get a 6 layer cake, start with cold cake. Using a knife, score a line around the outside of the cake as to where you want to cut. With a serrated knife cut along the line, turning the cake as you go until all cuts reach the middle of the cake. Frost as desired.
Toasted Marshmallow Frosting
– Makes enough to fill 3 (of the 6) layers
- 24 large white marshmallows
- 1 cup powdered sugar
- 2 sticks (1 cup) butter at room temperature
- 1/2 teaspoon pure vanilla extract
- 1 large (13 oz) container marshmallow fluff (or cream)
Place the marshmallows in a pan with a silicone baking mat or parchment paper. Place on the bottom rack of the oven and broil until brown. Make sure to watch them continuously as they go from brown to burnt very quickly. In a mixer fitted with the paddle attachment, mix butter and powdered sugar on low for about 1 minute. Add vanilla and mix on high for 3 minutes. Finally add marshmallow cream and powdered sugar and blend until just mixed through (about 1 minute). Spread evenly onto cooled layers.
Malted Chocolate Frosting
– Makes enough to fill 3 (of 6 layers) and to cover a 9″ cake
- 4 sticks (2 cups) butter at room temperature
- 4 cups powdered sugar
- 3 teaspoons pure vanilla extract
- 3/4 cup Ovaltine Chocolate malt mix (in the hot cocoa aisle)
- 8 oz bittersweet chocolate, chopped and melted (I used Ghirardelli)
- 1/2 cup heavy whipping cream*
Clean out the bowl and paddle used for toasted marshmallow frosting, and beat the powdered sugar and butter on low for about 1 minute. Add vanilla and ovaltine malt powder and beat on low to combine. Add the melted chocolate and beat on medium speed until smooth. Add whipping cream and beat on med-high for another minute. Use right away.
*Do not try to substitute half and half or any other milk- You will end up with a runny frosting (speaking from previous experiences).

All 3 recipes slightly adapted from Sweetapolita.
Soft “Store Bought” Sugar Cookies

There’s something about those store bought, frosted, cake-like sugar cookies that just makes you want to eat one. I actually remember the first time I tried one I thought to myself, “This might be the most artificial tasting cookie I have ever eaten”, yet for some reason I continued to eat them, with their chemical preservative taste and all. I think they must put something in them that just makes you fall in love, despite the fact that you are eating a “fresh” cookie with a shelf life of 3 months. Well, if you have become addicted to those cookies, consider this your saving substitute. These cookies taste like a better, preservative free version of the store bought cookies. Granted, there is still quite a bit of artificial dye in the frosting :-).
I made these to take in for my last day in the hospital on my family medicine rotation (sad to leave that place!). My motivation for making these was in part because I really did want to thank everyone who was so helpful on my rotation, and in part because I love having big groups of people to eat my baked goods! I enjoy the actual process of baking even if I don’t eat the end result, but with just the 2 of us here, baking becomes a dangerous habit. I chose blue and aqua for the colors because I wanted something summer-ish and these colors reminded me of the pool. With a heat index nearing 115°, I think we all have water on the mind.
You can really pick any mix-match of colors to dress these cookies up for just about any holiday, but I do have a few suggestions as far as the actual cookies are concerned. First, I substituted 2 oz of cream cheese for some of the butter, mostly because I don’t think you can ever go wrong with cream cheese; however, if you happen to only have butter, or you aren’t a cream cheese fan just use 3 full sticks of butter and leave the cream cheese out. Secondly, I was trying to plan ahead, so I made the cookie dough the night before and refrigerated it for about 24 hours. If you decide to make the dough ahead of time, just make sure to flatten the cookies out to the desired shape before baking because they will not spread on the pan if the dough is too cold. Finally, for some reason, I was worried that I wasn’t going to have enough icing… so I went kind of light on some of the cookies. Then I ended up throwing away a bunch of leftover icing. Don’t skimp like I did. After thinking back to the ones at the store, the icing should be almost as thick as the cookie.

Soft Frosted Sugar Cookies
Makes about 36 cookies
- 4 1/2 cups all-purpose flour
- 4 1/2 tsp. baking powder
- 3/4 tsp. salt
- 1 1/4 cups (2.5 sticks) butter, softened
- 2 oz cream cheese (about 1/4 cup) *Low-fat is fine
- 1 1/2 cups sugar
- 3 large eggs
- 5 tsp. vanilla extract
For the Icing:
- 5 cups (1 lb, 8 oz) powdered sugar, sifted
- 6 T. butter, melted (3/4 stick)
- 1 T. vanilla extract (use clear if you want white icing)
- 7-8 T. milk plus more if needed
- Food coloring, sprinkles (optional)
In the bowl of a stand mixer beat the butter, cream cheese and sugar until light and fluffy. Beat in eggs, one at a time. Then beat in vanilla. Slowly add the flour, baking soda and salt and mix until evenly incorporated. Chill dough for 30 minutes, or overnight.
To bake, preheat oven to 350˚ F. Line baking sheets with parchment paper or silicone baking mats. Spoon a heaping tablespoon of dough into your hand and roll into a ball, repeat. Place balls on a cookie sheet 2-3 inches apart. Using your hand or the bottom of a glass flatten each dough ball into a circle. (*Again depending on how chilled your dough is, the dough may or may not spread. If your dough is very chilled, you will need to flatten it into the shape you desire before baking). Bake for 10 minutes. (Cookies should not look brown). Let cool slightly on baking sheet and then move to a cooling rack.
Frosting: Place powdered sugar in a medium bowl, or the bowl of a stand mixer. Add the melted butter, vanilla, and milk to the bowl and whisk or stir on low until smooth. Add additional milk if necessary. Tint with gel food coloring if desired. Using a spatula, frost the cookies generously with the icing. While still wet, sprinkle with desired toppings. Icing will harden slightly to allow for easier storage. Keep in an airtight container.
Adapted from Annie’s Eats who adapted it from Hostess with the Mostess
Bean and Tortilla Pie

Unfortunately, I can be a bit of a perfectionist. A lot of times I will plan on putting something on the blog and after making it decide that it is just not tasty enough to share. After all, I am putting my personal endorsement on all the items on here, and I don’t want to lose your trust. Other times I will make something that is delicious but so un-photogenic that I can’t seem to get a nice picture of it, and I don’t want get some kind of ugly photograph reputation. Well in an effort to worry less about the small stuff, I decided to post this recipe even though my camera was just not cooperating with me. It should tell you something that I thought it was special enough to share even without a perfect picture.
I would describe this as a comfort food dinner. It’s especially handy to have in the recipe repertoire because it uses ingredients that I can store in my pantry or usually have on hand. I thought it was just going to turn out like a bunch of flour tortillas layered with beans, but something magical happens in the baking process. The cheese melts and the tortillas soften, and the whole thing solidifies into a concoction that actually does seem like a pie. For some reason I didn’t think about the fact that there is a lot of food going into this “pie” and it is way more than John and I could even try to eat. This is a filling pie, so I’m definitely adding it to my list of good dinners to make for company.

Speaking of company (such a sly transition :-)), last weekend our family got together to celebrate my Grandparent’s 60th wedding anniversary. They have certainly started a wonderful family to be a part of! Here’s a picture from our weekend:
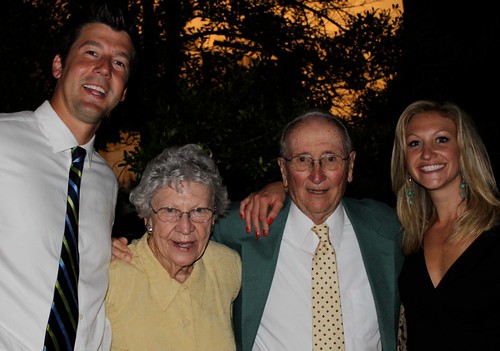
Happy Anniversary Grandma and Grandpa!
Bean and Tortilla Pie
Makes: 6-8 servings
- 4 9-inch flour tortillas
- 2 T. Olive Oil
- 1 large onion, diced
- 1 jalapeno, seeded and minced
- 3 garlic cloves, minced
- 1/2 t. ground cumin
- 1/2 t. chili powder
- Pinch of Salt and Pepper
- 2 – 15 oz cans black beans, drained and rinsed
- 1 cup water (or you can use beer if you didn’t drink what was in your fridge)
- 1/4 cup salsa
- 1 – 15 oz can refried beans, warmed to spreading consistency
- 2 cups frozen corn (about 10 oz)
- 4 scallions, thinly slices plus more for garnish
- 2 1/2 cups mexican style shredded cheese
- Garnish: Scallions, tomatoes, sour cream, cilantro, black olives
1. Preheat oven to 400°.
2. In a large saucepan heat oil on medium-high heat. Add the onions, jalapenos, garlic, cumin, chili powder and salt and pepper. Cook until softened, about 6 minutes.

3. Add in the black beans, scallions, salsa and water, and stir until well mixed. Bring the mixture to a boil, then reduce heat to medium-low to simmer. Continue to cook for about 10 minutes, stirring regularly, until most of the water has evaporated.

4. Once water has evaporated, remove pan from heat and add in the frozen corn and scallions. Mix to combine.

5. Lay a flour tortilla in the bottom of a 9-inch springfoam pan. Spread the tortilla with about 3 T. of refried beans. Then continue layering by spreading about 1 cup of bean mixture on top of the refried beans. Top the layer with 1/2 a cup of shredded cheese.

6. Repeat this layering with the 3 remaining tortillas. On the top layer, cover the beans generously with cheese.
7. Bake the “pie” for 20 minutes, or until the cheese is melted. Remove the sides from the springfoam pan, and top with garnishes of choice. Slice into wedges and serve warm.

Slightly Adapted from The Curvy Carrot
Shrimp, Avocado & Tomato Pizza

I honestly had no idea what to expect from this pizza. I had a hundred different directions I was thinking of going with it and I was worried that by trying to combine too many different flavors, I would end up with a disaster. I put this on the menu for last week, but I think my fear of failure along with some good rationalization about NEEDING to have summer fun caused me to go out to eat 5 days last week. (In my defense I think that’s a personal record, plus once everyone buckles down with school, it will be at least a little bit harder to hang out :-)). Finally, I decided that I couldn’t let avocados, tomato, cilantro and limes go to waste, so I concocted this specialty.
Well as you can probably guess based on the fact that I am putting it on the food blog – I really liked this pizza! It was unique, fresh, flavorful and used up the leftover shrimp I had in the freezer. (I have a bad habit of buying shrimp and only using half the bag.) I also used some of the pizza dough I had frozen, which made this pretty easy to put together. I almost skipped adding the chipotle, but I’m so glad I didn’t because I think it made the meal. If you are a bacon lover, I think that could also be a nice flavor complement, but I felt like it had enough ingredients without it. The only part that takes some time is chopping, so I would recommend doing it at the beginning so you can just go “chop crazy” all at once. P.S. chopping veggies is a pretty awesome way to wind down!

Shrimp, Avocado and Tomato Pizza
- 1 pizza dough ball
- 6 cloves garlic, minced
- 3 T. olive oil
- 1 cup shredded mozzarella and/or provolone cheese
- 2 scallions, chopped
- 2 large tomatos, chopped and drained
- 1 teaspoon adobo sauce or 1 t. finely chopped chipotle peppers in adobo sauce
- 10-20 medium sized shrimp, peeled and deveined
- 1/2 cup chopped cilantro
- 1 avocado, diced
- Juice of 1/2 a lime
1. Preheat oven to 475°, preferably with a pizza stone. Roll out the pizza dough. Brush with 2 T. olive oil and 4 cloves of minced garlic. Then spread cheese evenly over the top.

2. In a medium sauté pan add 1 T. olive oil and bring to medium-high heat. Add remaining 2 cloves of garlic and stir until fragrant. Then add the shrimp to the pan and stir for a 1-2 minutes.

3. Add the tomatoes, scallions and chipotle peppers to the pan, and sauté for an additional 2-3 minutes to soften the tomatoes and flavor the shrimp.

4. Spread the shrimp mixture over the pizza, and add a little bit of cheese on top if you feel like it.

5. Bake at 475° for about 15 minutes or until golden brown. Remove from oven and immediately top with cilantro and avocado. Squeeze lime juice over top of the pizza and serve.

A Spice is Nice Original.
Strawberry, Cream Cheese, Pretzel Squares

This dessert is kind of hard to describe. When you hear “Strawberry-Pretzel” it sounds weird, and even slightly gross, and I get that. Let me just tell you that when I was describing it to my mom, before I could even finish telling her about the middle layer of the dessert, she said, “That is my all time favorite summer dessert!,” and then she was disappointed that she couldn’t partake in eating it. I’m pretty sure that at some point in your life, you have eaten this dessert, perhaps without ever knowing what went into making it so delicious. I made this for the 4th of July BBQ we had when we got back from our camping adventure and since I wanted it to be red white and blue, I added some blueberries to the cream cheese layer. Unfortunately, you could hardly see the blue, or taste the blueberries, which should only tell you that this dessert should not simply be relegated to the 4th of July – you should probably just eat it all summer, or all year for that matter.
I’m sorry I didn’t get to take pictures of all the steps, but I was in kind of a hurry because I started making this without first reading the instructions carefully. This is probably the type of thing you should make the day before, or at least the morning of an evening BBQ, because jello takes a long time to set! I cut down the chilling time significantly (because I needed it ready by 7 pm), and it still turned out fine, so I have indicated this change in the recipe below. However, other than the waiting time between each layer, this was much simpler to put together than I imagined. Each layer is super easy- just mix and pour into the pan. The only baking required is the 10 minutes to set the pretzel crust. I even took the liberty of “lightening” this dessert, and it didn’t taste any different than I remember as a kid. In fact, a lot of people call this “Strawberry, Pretzel Salad”, so I’m pretty sure that means that you can eat a lot of it without feeling guilty ;-).
Strawberry, Cream Cheese and Pretzel Squares
Hands on time: 20 minutes Total Time with Cooling: 3 1/2 hours
Makes 1-13×9 inch pan, about 15-20 servings
- 2 cups finely crushed pretzels (Pulse in the food processor)
- ½ cup sugar, divided
- 10 T. butter (1 stick + 2 T.), melted
- 1½ pkg. (10 oz. total) PHILADELPHIA 1/3 less fat Cream Cheese, softened
- 2 Tbsp. milk
- 1 cup thawed COOL WHIP Whipped Topping
- 2 cups boiling water
- 1 pkg. (4 servings) JELL-O Brand Strawberry Flavor Gelatin
- 1 pkg. (4 servings) Sugar Free JELL-O Brand Strawberry Flavor Gelatin
- 1½ cups ice cold water (ice cubes are fine)
- 1 qt. (4 cups) strawberries, sliced
- 1 cup blueberries, if desired
Pretzel Layer: Preheat oven to 350°F. Mix pretzel crumbs, 1/4 cup of the sugar and all the butter. Press into bottom of 13×9-inch baking pan. Bake 10 min. Cool.
Cream Cheese Layer: Beat cream cheese, remaining 1/4 cup sugar and the milk until well blended. Gently stir in whipped topping and blueberries (if using). Spread over cooled crust. Refrigerate until ready to use.
Strawberry Jello Layer: While the above layers are in the fridge, stir boiling water into dry gelatin mix in large bowl for at least 2 minutes, until completely dissolved. Stir in ice cold water (it is fine if ice cubes are still in the water, they will melt). Put bowl in the freezer for 20 minutes, then remove and stir in strawberries. Pour cool jello over the cream cheese layer, and allow to solidify in the fridge for about 3 hours. Slice in squares and serve with a fork.
Adapted from Brown Eyed Baker, originally adapted from Kraft

Smoked Gouda Pasta Salad

Usually I’m one of those people who remembers the 4th of July on the 3rd of July, but this year was different. Since we have some organized and adventurous friends, we had a camping trip planned about month in advance of the holiday weekend. This was a good lesson for me in the fact that “anticipation is half the fun”, because it really was exciting having something to look forward to. I even bought some red and blue marshmallow roasting sticks as well as color coordinating paper plates to take with us. And of course, I was excited to plan some of the menu. When I saw this smoked gouda pasta salad, I immediately bookmarked it as a must try, and I thought camping would be the perfect opportunity.
I’m very familiar with the Caprese type pasta salad, and while the tomatoes, basil and mozzarella are tasty, I often feel that they are not strong enough flavors to create an interesting pasta salad. I’ve made that type of salad many times, and usually end up picking out everything but the pasta. That’s what I think is so great about this recipe – the pasta itself has some great flavor. It’s also really easy to make and requires pretty basic ingredients. While you might not regularly buy chipotle peppers in adobo sauce, they add a lot of great flavor for a small cost. The thing that used to annoy me about them is that most recipes only call for 1-2 peppers and I would inevitably let the leftovers sit in the fridge until they looked so gross that I didn’t feel guilty throwing them away- but I have found the solution. Well, actually I should say that Sara over at Our Best Bites has found the solution: freeze the peppers in individual cubes of how much you might need. See her post here to see what I’m talking about. But seriously, don’t skip the chipotles- the adobo has very little spice but adds a smokey flavor that complements the gouda nicely. Then you can make this pasta salad and eat it out of individual ziplocs like we did on our picnic (classy I know). Or don’t do that, and eat it like a normal person, out of a bowl – I’m pretty sure it will taste good either way.
By the way, we went to Mackinac Island. You should totally make the trip if you live anywhere near Michigan, or even if you don’t. I did not remember such cool places existing in Michigan – it’s kind of making me change my view of the Midwest (at least until winter comes :-)). 
Smoked Gouda Pasta Salad
Serves 10-12 as a side
- 1 lb (16 oz) Mostaccioli pasta
- 1/2 cup light Mayonnaise
- 1/3 cup Milk (I used part skim, part cream)
- 5 Tablespoons White Vinegar
- 1 T. Adobo Sauce From Chipotle Peppers
- Salt and Ground Black Pepper To Taste
- 2 pints Grape Tomatoes, Halved Lengthwise
- 1/2 pound Smoked Gouda Cheese, Cut Into Small Cubes
- 30 whole Basil Leaves, sliced thin (chiffonade)
1. Cook pasta according to pasta directions. Drain and rinse in cold water to prevent pasta from sticking.
2. In a large bowl, mix mayonnaise, milk, vinegar, salt, pepper, and adobo sauce.
3. Add the pasta, halved tomatoes, cubed gouda and basil to the sauce in the large bowl. Stir to incorporate, and add more salt and pepper to taste. Chill before serving (or keep on ice in your camping cooler).
Adapted from The Pioneer Woman

S’more Nachos
When John and I took a trip out to New Mexico over spring break, in addition to skiing, hiking and visiting with my in-laws, we got to try this great restaurant called Graham’s Grill. (Side Note: it’s pretty nice to have parents-in-law that both happen to live in vacation spots :-)). The restaurant combines the traditional flavors of the southwest but puts it’s own unique spin on them. The chef, Lesley B. Fay recently came out with a cookbook called Straight From the Heart, and my mother-in-law was nice enough to surprise me at the end of the meal with my very own copy. I have looked through the cookbook so many times trying to decide what to make but I finally decided that I couldn’t pass up a recipe combining 2 of America’s greatest inventions – S’mores and Nachos. (Another side note: I used to think nachos were from Mexico – then I went there in college and searched every restaurant menu for them only to find out that they don’t actually serve nachos in Mexico… definitely an American creation.)
The original recipe called for deep frying tortillas, but after my recent frying disaster, I chose to make them in the oven instead . It was actually a good reinforcement that never again do I need to fry anything, because the “chips” still came out crisp and delicious without having to mess with hot oil. In fact, I think cinnamon-sugar chips would be a pretty great snack on their own – so next time I will likely make a double batch. The recipe itself is pretty self-explanatory, but I’ll have to say Lesley must be some kind of genius for thinking up the idea of “S’more nachos” in the first place! If you really want to go crazy, you could try using ice cream as a dip for these nachos. I’m sure this would be fabulous – warm cinnamon chips against cool ice cream – but you might have to skip dinner all together if you want to try that. So if you don’t have the pleasure of a campfire this Fourth of July, make this instead….It’s definitely easier than building a fire ;-).
S’more Nachos
Serves 3-4
For the chips:
- 6-8 small (6 inch) flour tortillas
- 3 T. melted butter
- 1/2 cup sugar
- 1 T. cinnamon
For the Topping:
- 1/2 cup chocolate chips
- 1/4 cup white chocolate chips
- 1 1/2 cups miniature marshmallows
- chocolate syrup for drizzling (optional)
Preheat oven to 350°. Mix cinnamon and sugar together in a dish. Using a pastry brush, spread melted butter onto both sides of the tortillas. Sprinkle 1 side of each tortilla with a covering of cinnamon-sugar mixture. Using a kitchen scissors (or knife), cut each tortilla into 8-10 triangles. Without overlapping, place triangles sugar side up on a large baking sheet and bake for 10-15 minutes or until the edges turn up.

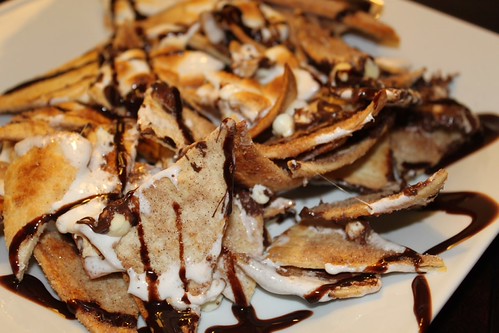
Remove chips from oven and combine into a pile on a small baking sheet or oven-proof dish. Sprinkle with chocolate chips, white chocolate chips and marshmallows. Turn the oven on broil, and place the baking sheet on the middle rack (too close to the heat will catch your marshmallows on fire). Watch carefully until the marshmallows are browned, about 5 minutes. Remove from the oven, transfer to a serving dish and drizzle chocolate syrup over the chips. Serve warm.
Before:

And the Aftermath:

– Nachos Adapted from from Straight From the Heart by Lesley B. Fay.
– Cinnamon Chips adapted from Our Best Bites

