
Bean and Tortilla Pie

Unfortunately, I can be a bit of a perfectionist. A lot of times I will plan on putting something on the blog and after making it decide that it is just not tasty enough to share. After all, I am putting my personal endorsement on all the items on here, and I don’t want to lose your trust. Other times I will make something that is delicious but so un-photogenic that I can’t seem to get a nice picture of it, and I don’t want get some kind of ugly photograph reputation. Well in an effort to worry less about the small stuff, I decided to post this recipe even though my camera was just not cooperating with me. It should tell you something that I thought it was special enough to share even without a perfect picture.
I would describe this as a comfort food dinner. It’s especially handy to have in the recipe repertoire because it uses ingredients that I can store in my pantry or usually have on hand. I thought it was just going to turn out like a bunch of flour tortillas layered with beans, but something magical happens in the baking process. The cheese melts and the tortillas soften, and the whole thing solidifies into a concoction that actually does seem like a pie. For some reason I didn’t think about the fact that there is a lot of food going into this “pie” and it is way more than John and I could even try to eat. This is a filling pie, so I’m definitely adding it to my list of good dinners to make for company.

Speaking of company (such a sly transition :-)), last weekend our family got together to celebrate my Grandparent’s 60th wedding anniversary. They have certainly started a wonderful family to be a part of! Here’s a picture from our weekend:
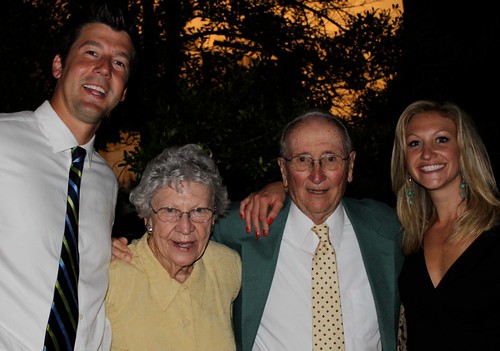
Happy Anniversary Grandma and Grandpa!
Bean and Tortilla Pie
Makes: 6-8 servings
- 4 9-inch flour tortillas
- 2 T. Olive Oil
- 1 large onion, diced
- 1 jalapeno, seeded and minced
- 3 garlic cloves, minced
- 1/2 t. ground cumin
- 1/2 t. chili powder
- Pinch of Salt and Pepper
- 2 – 15 oz cans black beans, drained and rinsed
- 1 cup water (or you can use beer if you didn’t drink what was in your fridge)
- 1/4 cup salsa
- 1 – 15 oz can refried beans, warmed to spreading consistency
- 2 cups frozen corn (about 10 oz)
- 4 scallions, thinly slices plus more for garnish
- 2 1/2 cups mexican style shredded cheese
- Garnish: Scallions, tomatoes, sour cream, cilantro, black olives
1. Preheat oven to 400°.
2. In a large saucepan heat oil on medium-high heat. Add the onions, jalapenos, garlic, cumin, chili powder and salt and pepper. Cook until softened, about 6 minutes.

3. Add in the black beans, scallions, salsa and water, and stir until well mixed. Bring the mixture to a boil, then reduce heat to medium-low to simmer. Continue to cook for about 10 minutes, stirring regularly, until most of the water has evaporated.

4. Once water has evaporated, remove pan from heat and add in the frozen corn and scallions. Mix to combine.

5. Lay a flour tortilla in the bottom of a 9-inch springfoam pan. Spread the tortilla with about 3 T. of refried beans. Then continue layering by spreading about 1 cup of bean mixture on top of the refried beans. Top the layer with 1/2 a cup of shredded cheese.

6. Repeat this layering with the 3 remaining tortillas. On the top layer, cover the beans generously with cheese.
7. Bake the “pie” for 20 minutes, or until the cheese is melted. Remove the sides from the springfoam pan, and top with garnishes of choice. Slice into wedges and serve warm.

Slightly Adapted from The Curvy Carrot
Baked Creamy Chicken Taquitos

Sometimes I miss college. Well, let me rephrase. Sometimes I miss certain parts about college. Like the part where you can walk up and down the halls of the dorm and always find someone with their door open to hang out with. And the part where the most important thing on a weekend was figuring out what costume would be perfect for the theme of the next party (okay, so sometimes I still do this). But the thing I was missing this week was Torero’s – the signature Mexican restaurant in our college town. Because our meal plan was ridiculous, you could get Torero’s delivered to your dorm room anytime you wanted, on meal plan points. I had tried a variety of things from the menu, but one time someone ordered Taquitos, I tried one, and I fell in love. I’m pretty sure every time after that, I ordered chicken taquitos myself. Somehow I happened to never actually read the menu to realize they were deep fried, and although they clearly looked deep fried, I chose to ignore this little fact.
I don’t think I’ve had a taquito since college, but when I saw these baked chicken taquitos on Pink Parsley, I knew I would have to try them. Not only are they a baked version of my favorite college Mexican treat, but they also use my favorite salsa – Salsa Verde. (The same salsa I use in Chicken Enchiladas Verdes). Don’t be intimidated by the long list of ingredients, because these really don’t take that long to put together – in fact I think these are easier to make than the enchiladas. If I was a little more organized, I would’ve planned grilled chicken for dinner one night, and made sure to cook enough to have leftovers for these the next. Perhaps one of the greatest things about these taquitos is that you can freeze them (unbaked) and then bake them whenever needed. Actually, the ones in the picture were baked from a frozen state. I originally planned to post this the first time I made them – but we ate up all the taquitos so quickly that I didn’t get to snap a picture. I’ll have to say, they taste just as good from the freezer as they did the first time. This would also be a great meal for a big group dinner, because once you have the filling made it’s really simple to put together, and have you ever met a person who doesn’t like food they can eat with their fingers?

Baked Chicken Taquitos
– Recipe indicated is for 20-24 taquitos, which will serve 6-8 people
- 3 -4 chicken breasts (~4-5 cups shredded)
- 1 block (8 oz) low-fat cream cheese, softened
- 3/4 cup salsa verde (tomatilla salsa)
- Juice from 1 lime
- 2 tsp chile powder
- 1 tsp ground cumin
- pinch cayenne pepper
- 1 tsp onion powder
- 6 cloves garlic, minced
- 1/2 cup chopped fresh cilantro
- 1/2 cup chopped scallion
- 1 cup shredded extra sharp cheddar cheese
- 3/4 cup shredded Pepperjack cheese
- salt and freshly ground black pepper
- 20-24 small (6-inch) flour tortillas
- cooking spray
Bring a large saucepan filled with water to a boil over high heat. Add chicken breasts to the water, reduce heat, and simmer for about 20 minutes, or until chicken is no longer pink when cut into. Remove chicken from water, let cool slightly and then shred. (You could also use leftover chicken, or roast the chicken in the oven)
Preheat the oven to 425 degrees, and lay a wire cooling rack over a large cookie sheet.
In a large bowl, combine the cream cheese with the salsa, lime juice, cumin, chile powder, cayenne, onion powder, garlic, cilantro, scallions, and a pinch of salt & pepper. (Everything but the chicken, cheese, and tortillas). Once mixed, fold in the chicken and shredded cheeses.
Spoon 3-4 tablespoons of filling onto the lower third of each tortilla, and roll tightly. In order to help the tortilla stay closed, you may want to spray some cooking spray on the seam. Place seam side-down on the wire rack. Repeat with remaining tortillas and filling.
Spray the taquitos with cooking spray, then place the wire rack on top of a baking pan (otherwise the cooking spray creates a sticky residue when baked on the cookie sheet.) Bake 15-20 minutes, or until the tortillas are crisp and golden-brown. Serve with dipping sauces such as salsa, sour cream, and guacamole. I think sour cream mixed with salsa would also be delicious.
*To Freeze the taquitos, roll them up as usual but do not bake. Place on a baking sheet in the freezer in order to “flash” freeze them individually. Wrap in plastic wrap, then aluminum foil and freeze in a freezer bag. To bake, remove from oven, and bake un-thawed for 20-25 minutes at 425 degrees.
Slightly adapted from Pink Parsley Catering, via Pennies on a Platter, Originally from Our Best Bites

