
Lobster Corn Chowder

Being on away rotations, I haven’t been up to my usual menu planning and weeknight meal routine. Between applications, scheduling interviews, and overall crazy hours, I haven’t missed it too much, but I’m not sure I can say the same for John (who has been eating chez chef Boyardee). But to make up for it, I was able to rationalize this fancy weekend meal. (It also didn’t hurt that Mom was buying :-)). After apple picking, running and hiking in the park, this chowder was the perfect end to a fall themed day. It is really one for the record books. It will make you feel like you on dining on the set of barefoot contessa and it would be the perfect fall meal for company, or if you just feel like indulging yourself.

This was my first time ever cooking with lobster, and I don’t pretend to know much about it. I did learn that it is very easy to overcook it, and for such an expensive meat, that is really something you don’t want to do. So err on the side of undercooked, because it will inevitably cook a bit more once you add it to the stew. Also, while this soup still tasted wonderful the next day, I did notice that there was a bit of color separation, which didn’t make for the most gorgeous photograph. If you want to see what it looked like the first night, check out this blog. Despite the work, and the amount of cream (once in a while..) this is definitely something I will be making again. In fact, it almost makes me wish I actually lived in New England, which is saying a lot for a girl who hates the cold :-).
Lobster Corn Chowder
Serves 6
Ingredients:
- 3 (1 1/2lb) cooked lobsters
- 3 ears of corn
For the stock:
- 4 tablespoons unsalted butter
- 1 cup chopped yellow onion
- 1/4 cup sherry
- 1 teaspoon paprika
- 4 cups milk (skim works fine)
- 2 cups heavy (whipping) cream
- 1 cup dry white wine
For the soup:
- 1 tablespoon good olive oil
- 1/4 pound bacon, large-diced
- 2 cups large-diced unpeeled Yukon gold potatoes (2 medium)
- 1 1/2 cups chopped yellow onions (2 onions)
- 2 cups diced celery (3 to 4 stalks)
- 1 tablespoon kosher salt
- 1 teaspoon freshly ground black pepper
- 2 teaspoons chopped fresh chives
- 1/4 cup sherry
Instructions:
- Remove the meat from the shells of the lobsters. Cut the meat into large cubes and place them in a bowl. Cover with plastic wrap and refrigerate. Reserve the shells and all the juices that collect. Cut the corn kernels from the cobs and set aside, reserving the cobs separately.
- For the stock, melt the butter in a stockpot or Dutch oven large enough to hold all the lobster shells and corncobs. Add the onion and cook over medium-low heat for 7 minutes, until translucent but not browned, stirring occasionally. Add the sherry and paprika and cook for 1 minute. Add the milk, cream, wine, lobster shells and their juices, and corn cobs and bring to a simmer. Partially cover the pot and simmer the stock over the lowest heat for 30 minutes.
- Meanwhile, in another stockpot or Dutch oven, heat the oil and cook the bacon for 4 to 5 minutes over medium-low heat, until browned and crisp. Remove with a slotted spoon and reserve. Add the potatoes, onions, celery, corn kernels, salt, and pepper to the same pot and saute for 5 minutes. When the stock is ready, remove the largest pieces of lobster shell and the corn cobs with tongs and discard. Place a strainer over the soup pot and carefully pour the stock into the pot with the potatoes and corn. Simmer over low heat for 15 minutes, until the potatoes are tender. Add the cooked lobster, the chives and the sherry and season to taste. Heat gently and serve hot with a garnish of crisp bacon
Source: Smells Like Home , originally adapted from Back to Basics by Ina Garten
Grilled Blueberry BBQ Salmon

Apparently there are some people in this world who don’t like fruit with their fish. Thankfully, I don’t know any of them. If you happen to be a fruit with fish hater (tear), perhaps this recipe will convert you. Especially with summer “officially” here, this is a refreshing dinner that is easy to throw together after a day at the pool, and won’t ruin your waistline for the rest of bikini season. I was somewhat hesitant about the sauce, since it’s fruit combined with garlic, onion and mustard powder – but I figured anything originally from The Neely’s would be hard to ruin. Somehow the flavors just seem to work, and created an interesting twist on a simple salmon recipe.
I personally like to keep the skin on the salmon it because it keeps it in one piece while grilling and adds moisture to the filet, but you could also grill up a fish filet as long as you throughly oil the grate. While the sauce is mostly “hands off”, it does need about 30 minutes total of simmer time – which I kind of enjoy because it gives you a chance to shower from the pool, pick up the house, or just relax with a glass of wine on the patio. Unfortunately my brother won’t be bringing any Copper River salmon back from Alaska this year, but if your pocketbook can afford it, it’s in season now!

Grilled Blueberry BBQ Salmon
Serves 2-4 depending on amount of salmon used
- ¾ – 1 ½ pounds salmon filet, with skin on
- Salt and Pepper
For the Sauce:
- 1/2 cup fresh blueberries
- 1/3 cup ketchup
- 1 tablespoon apple cider vinegar
- 1 tablespoon balsamic vinegar
- 2 tablespoons brown sugar
- 1/4 teaspoon garlic powder
- 1/2 teaspoon onion powder
- 1/2 teaspoon ground mustard
- 1 teaspoon worcestershire sauce
Heat a small saucepan over low heat and add blueberries. Heat for about 10 minutes, then mash with a fork. Add in ketchup, both vinegars, brown sugar, onion and garlic powder, ground mustard and worcestershire sauce. Whisk well to combine and break up blueberries and turn the heat up to medium. Heat until simmering and bubbles appear, then turn heat back down to low. Cook for an additional 20 minutes, whisking every few minutes. Sauce will be thicker than a normal barbecue sauce.
Preheat your grill to it’s highest setting and spray grate with oil. Season the salmon with salt and pepper, and once the grill is hot, lay skin side up directly on grate. Cook for 5 minutes, then gently flip so that skin side is down. Using a pastry brush, brush BBQ sauce on salmon and let cook until flaky and opaque, about 5-6 more minutes. Adjust time as needed for thicker/thinner salmon (mine was about 1 1/2 inches with skin.)
Source: How Sweet It Is
Shrimp and Grits

Wow, it’s been way to long since I posted! I have a few (debatably good) excuses though. First I finished up my family medicine rotation with a pretty tough standardized test, then John and I went on vacation to San Fran, wine country and point reyes, and this week I started a rotation in Dermatology in Bryan, OH. It’s been a busy but fun couple of weeks!
I think my favorite part about vacation had to be Sonoma. It was a beautiful but relaxed town and if it wasn’t clear across the country I could totally see myself living there someday. (I checked residency programs, and unfortunately there are none in wine country. boo.) We also had a lot of fun biking all around San Francisco and across the golden gate bridge, as well as hiking in point reyes national seashore.

Now that I’m in Bryan, I haven’t really been cooking much since it would require me to fill a whole new pantry with ingredients and transport my favorite pots and pans an hour and a half; however I do have the weekends off so my goal for the rest of the year is to post one time per week. I’ll start with this recipe for Shrimp and Grits.

We had this for dinner before we left for vacation, and I have been thinking about it off and on since then. I made this thinking it would be a nice treat for the butter, cheese and generally southern food loving member of our family, but as it turns out I ended up being the one who was head over heels for this dinner. Not to say that John didn’t love it as well, I just surprised myself by how much I could love something made with grits and bacon. The parsley and green onions really help to cut down on the heavy feeling of this dish and I think I might even add more next time. I was also surprised by how quickly this dish came together and how few unusual ingredients it required. Now that I have grits in the pantry, I think this is going to become one of my go to weeknight meals because 1) I really loved it and 2) I generally have all these ingredients around and 3) it’s pretty easy to put together. I know that you’re probably starting to think I must work for Costco or something, but I did want to mention that I found the best large, individually frozen shrimp there for the best price. Now that I have a costco sized bag of jumbo shrimp in the freezer, I have even more excuses to make this delicious dish again.
Shrimp and Grits
Serves about 4 (I made about half this recipe for the 2 of us)
- 4 cups water
- 1 cup grits (regular or quick cooking but NOT instant)
- 3 T. butter
- 1 heaping cup shredded cheddar cheese
- Salt and pepper
- 1 pound peeled and deveined shrimp
- 5 slices bacon
- Juice of 1/2 a lemon (about 2 T.)
- 2 T. coarsely chopped parsley, plus more for garnish
- 3/4 cup thinly sliced scallions, plus more for garnish
- 1 garlic clove, minced
- Hot sauce if desired
1. Bring water to a boil. Add grits to the boiling water and stir. Add salt and a bit of pepper. Lower heat, bring to simmer and cover until water is absorbed. Follow the directions on your box of grits because cooking times vary.
2. Once thick, remove from heat and stir in butter and shredded cheese. (Feel free to add more butter or shredded cheese – (John would’ve if he was making this…)

3. Rinse and pat shrimp dry. You don’t want them dripping water when you add them to hot oil.
4. Fry the bacon in a large skillet. When cooked through remove from the pan and crumble.
5. Add shrimp into the bacon grease pan. Cook until shrimp turn pink. Add lemon juice, bacon, scallions, garlic and parsley. Cook for another three minutes.

6. Spoon the grits into a serving bowl and top with shrimp mixture. Add extra scallions and parsley. Serve immediately.
 Adapted from Our Best Bites and Joy the Baker
Shrimp, Avocado & Tomato Pizza

I honestly had no idea what to expect from this pizza. I had a hundred different directions I was thinking of going with it and I was worried that by trying to combine too many different flavors, I would end up with a disaster. I put this on the menu for last week, but I think my fear of failure along with some good rationalization about NEEDING to have summer fun caused me to go out to eat 5 days last week. (In my defense I think that’s a personal record, plus once everyone buckles down with school, it will be at least a little bit harder to hang out :-)). Finally, I decided that I couldn’t let avocados, tomato, cilantro and limes go to waste, so I concocted this specialty.
Well as you can probably guess based on the fact that I am putting it on the food blog – I really liked this pizza! It was unique, fresh, flavorful and used up the leftover shrimp I had in the freezer. (I have a bad habit of buying shrimp and only using half the bag.) I also used some of the pizza dough I had frozen, which made this pretty easy to put together. I almost skipped adding the chipotle, but I’m so glad I didn’t because I think it made the meal. If you are a bacon lover, I think that could also be a nice flavor complement, but I felt like it had enough ingredients without it. The only part that takes some time is chopping, so I would recommend doing it at the beginning so you can just go “chop crazy” all at once. P.S. chopping veggies is a pretty awesome way to wind down!

Shrimp, Avocado and Tomato Pizza
- 1 pizza dough ball
- 6 cloves garlic, minced
- 3 T. olive oil
- 1 cup shredded mozzarella and/or provolone cheese
- 2 scallions, chopped
- 2 large tomatos, chopped and drained
- 1 teaspoon adobo sauce or 1 t. finely chopped chipotle peppers in adobo sauce
- 10-20 medium sized shrimp, peeled and deveined
- 1/2 cup chopped cilantro
- 1 avocado, diced
- Juice of 1/2 a lime
1. Preheat oven to 475°, preferably with a pizza stone. Roll out the pizza dough. Brush with 2 T. olive oil and 4 cloves of minced garlic. Then spread cheese evenly over the top.

2. In a medium sauté pan add 1 T. olive oil and bring to medium-high heat. Add remaining 2 cloves of garlic and stir until fragrant. Then add the shrimp to the pan and stir for a 1-2 minutes.

3. Add the tomatoes, scallions and chipotle peppers to the pan, and sauté for an additional 2-3 minutes to soften the tomatoes and flavor the shrimp.

4. Spread the shrimp mixture over the pizza, and add a little bit of cheese on top if you feel like it.

5. Bake at 475° for about 15 minutes or until golden brown. Remove from oven and immediately top with cilantro and avocado. Squeeze lime juice over top of the pizza and serve.

A Spice is Nice Original.
Salmon Cakes with Lemon Yogurt Sauce
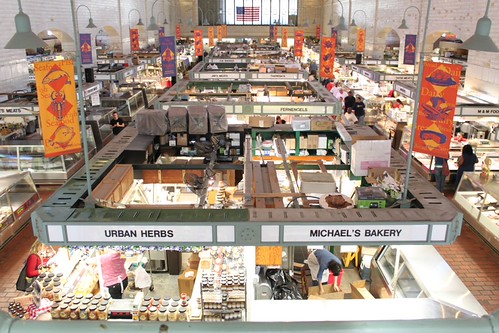
After 6 long weeks of studying (plus 2 years of med school), I finally finished that huge exam. Honestly, I will have no idea how it went until I get my score in about a month- but for now, I’m just celebrating being done! I spent the evening after my test in Toledo hanging out with friends, and then left the next day for a “vacation” to Brecksville with my Mom. While I put vacation in quotes, it really has been a vacation. Between a lot of wine and a lot of fun family time, we managed to make a trip down to the West Side Market. Of course, I had a blog menu all planned out – and my mom was really excited to take part in something that was going to go on the internet :-).

If you’re from Cleveland, or ever visiting, I highly recommend a trip downtown to see it. It’s a really unique atmosphere, with every other stand trying to sell you their best produce (or at least the produce they have too much of).

You can get some great deals on really fresh food, and they even have an indoor market where they sell meat, fish, cheese, baked goods, and even prepared foods like homemade pasta and crepes.
After getting all the ingredients at the market, we stopped at Penzey’s spices which is right across the street. I have wanted to go to Penzey’s for a while, so I was really excited that their new store happened to be so close. They have just about every spice you could ever want, including about 8 different varieties of cinnamon. I ended up getting poppy seeds, Ancho peppers and Garam Masala – all of which I’m really excited to use. And the prices are surprisingly reasonable ($8 total for my loot).

Now onto the Salmon Cakes! These babies have been one of my favorite dishes since way back when I was living in LA (that’s Louisiana not the cooler California version). I decided to try this recipe after Whitney had introduced me to crab cakes at Red Bar near Seaside, FL. I have no idea why I never tried a crab cake before this but I found that I loved them and am now constantly on the lookout for good ones.
However, the price of lump crab meat is daunting (especially here, far from the ocean), so I thought salmon cakes would be a nice alternative. These always prove to be delicious, and they are quite easy to make. I think the hardest part is removing the skin from the salmon filet – but most of the time the Fishmonger will do this for you, as long as you remember to ask.
While this recipe doesn’t call for a lot of ingredients, I think each of them is very important – so don’t skimp. I know adding pita to a salmon cake might seem a little strange, but the texture is much nicer than the usual breadcrumbs, and then you have some leftover pita bread sitting around your house (plus!). The coriander is the main spice, and it really complements the salmon well. If you like a lot of spice, feel free to up the cayenne pepper – but I usually only add a small pinch, and they are still plenty flavorful. Finally, the lemon yogurt sauce is a must to serve with these. It’s super easy to put together since you already zest a lemon and chop chives to put into the salmon cakes – the only other ingredient you need to buy is the yogurt itself.
I served the cakes with a cucumber salad – which complemented nicely but it not quite up to blog standards yet. Hopefully I’ll tweak it and share it with you soon!

Salmon Cakes with Lemon Yogurt Sauce
-Makes 4-5 salmon cakes or enough for about 3-4 people.
- 1 pound skinless salmon fillet, roughly cut into 1/2 inch pieces
- 1 large pita round (~10 inches), torn into small pieces
- 1/4 cup light mayonnaise
- 1 large egg
- 1/2 teaspoon coriander
- small pinch of cayenne pepper
- pinch of salt
- 4 T. total chopped Chives (divided)
- 2 teaspoons total lemon zest (divided)
- 2 T. olive oil (for sautéing)
For the Sauce:
- 3/4 cup plain yogurt
- 1 T. lemon juice
- Plus half the chives and half the lemon zest from above
To prepare the yogurt sauce: Mix the yogurt, lemon juice, 2 tablespoons of chives and 1 teaspoon of lemon zest in a small bowl. Keep cold until ready to serve.
In a medium bowl, mix together salmon, pita, mayonnaise, egg, coriander, cayenne pepper, salt and 2 T. chives and 1 teaspoon lemon zest.

Form the mixture into 4-5 patties, about 3-4 inches in diameter. This can be done ahead of time – just cover with plastic wrap and keep in the fridge).
Heat the oil on medium-high in a large stainless steel skillet. Cook the salmon cakes on medium high for 3-4 minutes per side (6-8 minutes total), or until golden brown on each side.
Serve warm with lemon wedges and yogurt sauce.

Adapted from Epicurious
Salmon with Mango Salsa

For some reason whenever I put salmon on the weekly menu, it seems to get pushed back to another day, or another week. The last time I bought salmon, it sat in the fridge until I was afraid to look at it and had to throw it out. This is really a shame considering that once I actually make salmon, I LOVE it! This meal was no exception to my salmon “fear”. I had gotten all the ingredients for the salsa and couscous, but when dinner time rolled around, I was really hesitant to pick up the salmon and make this dinner. Because we didn’t really have anything else planned for dinner, and because if I didn’t make it, all the other ingredients would go bad, I couldn’t really talk myself out of it (although I tried).
As soon as I starting chopping for the salsa, I was over my fear and glad that I had decided to make the salmon. When I tasted the final product, I was even happier. I actually couldn’t believe that I was considering scraping this dinner for grilled cheese instead :-)! This dinner came together quickly, and was delicious! I served it over plain couscous that I cooked with chopped green onion and dried cranberries – which was also pretty yummy. I think once the weather gets a little warmer, I’ll grill the salmon instead of broiling it, but broiling is easy and it came out great.
Salmon with Mango Salsa
– Makes 3-6 servings depending on the size of salmon filet used (Estimate ~4 oz per person)
For the Mango Salsa
- 1 Mango, peeled and chopped
- 1/2 of a cucumber, peeled and chopped
- A few strips of red bell pepper, chopped
- ~1/4 cup of red onion, chopped
- ~3 Tablespoons cilantro, chopped
- Juice from 1/2 a lime
- pinch of salt
Combine all ingredients in a small bowl and mix.
For the Salmon
- 1-2 lbs wild salmon filets
- Juice from 1/2 a lime
- 2-3 Tablespoons light mayonaise
- Salt and pepper
Preheat broiler. Sprinkle lime juice over the salmon. Spread mayonaise over the filet using the back of a spoon. Sprinkle with salt and pepper. Place salmon on a broiling pan lined with tin foil, and broil for about 10 minutes, until cooked through. To serve, cut into smaller filets, top with mango salsa, and serve over couscous or rice pilaf.
Source: A Spice Is Nice Original
Panko Crusted Salmon

Back on the homefront, I’m trying to make the best out of my last 3 days of my last spring break…ever! Because THE BOARDS are looming over our heads, I’m not really sure if I’ll be able to make it home for a visit before July – so my Mom decided to make the trek here to visit! Unfortunately, the weather was really awful in Cleveland (so much for spring), but my Mom’s a brave lady, and she tackled the snow to make the drive to Toledo. I’m really glad she did because we had a lovely day “fliting” around, and of course I wanted to make a special dinner for the evening.
This dinner exceeded my expectations. I knew I wanted to make salmon – but salmon is such a hearty fish that I have trouble deciding what to do to make it special without overpowering its great flavor. While visiting my favorite “club” – Costco – I was flipping through Ina Garten’s new book, and saw a recipe using Panko with Salmon. Because I have also really been wanting to use Panko, I thought this would be the perfect opportunity to try it. I didn’t buy the book, so this is my own adaptation.
It turned out to be really easy but it tasted, and looked gourmet (win-win!) I loved the lemon zest in the crumb coating, and you definitely shouldn’t skimp on it. I also think that salmon is one of the fish that you need to be careful to buy “Wild Caught”. It’s a little more expensive than the farm raised, but it’s a lot healthier and has a better flavor. For some fish – it doesn’t really matter, but salmon is not one of those fish. Panko crumbs can be found in any local grocery store, usually near the Asian food.
Panko Crusted Salmon
Serves 4-5
- 1 lb Wild Caught Salmon filets
- 3/4 cup Panko
- 1/4 cup finely chopped parlsey
- zest of 1 large lemon (or 2 small)
- 2 Tablespoons Olive Oil
- 1 Tablespoon Dijon Mustard
- 1 Tablespoon Mayonaise
- Salt & Pepper
Preheat oven to 375 degrees.
In a small bowl combine the Panko, parsley, lemon zest and olive oil. Stir until well blended and Panko is evenly coated with olive oil. In an even smaller bowl, mix together 1 T. each of Dijon mustard and mayonaise.
Place salmon filets on a baking sheet coated with aluminum foil. Sprinkle evenly with salt and pepper. Spread the Mayonaise and Dijon mixture evenly over the filet. Sprinkle the Panko crumb mixture evenly over the fish. The mustard mixture should help the coating to stick, but press to adhere.
Bake the salmon for 10-15 minutes (Using a 1 inch filet 15 minutes was good for me).
Serve with lemon wedges. Also good with rice pilaf and roasted asparagus.
Inspired by How Easy Is That? by Ina Garten.

